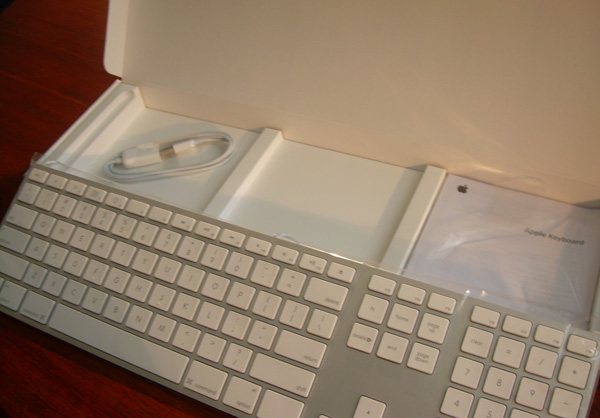
I’ve been shopping for a new keyboard for a few weeks now. The keys on my old board have been getting harder to press down, and frequently don’t connect unless you hit them direct on. Probably a combination of age, dust and cheapness. After doing a bit of research to make sure it would work okay with a PC, I ended up getting one of the new Apple keyboards which were announced not long after I started shopping around.
When I saw the first photos of the Apple keyboard on the web, the scrabble-tile keys, lack of gaps between the function keys, and overall look gave me the impression that it was designed for form more than function. However having now had a chance to use it, I must say it’s one of the most comfortable desktop keyboards I’ve ever used. So now, having had the chance to use it in earnest for several hours, here’s my experience so far as a PC user using the new Apple keyboard.
Physical Comparison
Layout and Keys
The most important thing PC users thinking about getting an Apple keyboard need to know is how the key layout matches up. The Apple keyboard has 109 keys and it’s format is very close to that of a regular old-skool PC extended keyboard with a few important differences. I’ll go through what those differences are first, and later I’ll show you how you can remap most keys to match the functions you’re used to on a PC keyboard.
The main part of the keyboard is very close in layout to a PC keyboard. The differences are:
- The Apple Command keys to the left and right of the space bar act as Windows keys when connected to a PC, however the location of the Alt and Command keys are switched around compared to the PC keyboard. This means you will find yourself hitting the Windows key when you go for the Alt key.
-
The pipe key (i.e: ) is above the Enter key (which is called Return by the way) rather than to the right of the “+ =” key, but this is the case on some PC keyboards as well, so it’s probably not an issue for most people. - The keys in the function key strip including the Esc key are slightly smaller vertically than the other keys, and the function keys aren’t in groups of four as is the case on most old-skool PC keyboards.
- There is also one extra key in the function key strip - eject - which isn’t on a PC keyboard.
I must say that my preference is for a keyboard with the function keys grouped in fours. It does make it much easier to locate the correct F key by feel without looking down at the board. If you use applications like Visual Studio which make heavy use of the F keys, this may or may not be a problem for you. I’ve been using one of those minimalist Dell keyboards at work for the past year which also does not group the F keys, so I’m kind of used to it, but still grouping is preferable in my book.
The middle section (to coin a technical term) is again very similar to that found on a PC but with two important differences:
- The Insert key found on a PC keyboard is replaced by a Fn key on the Apple keyboard
- The Print Screen, Num Lock and Pause keys on a PC keyboard are replaced by F13, F14, F15 keys.
The number pad’s layout is slightly different to a typical PC keyboard with the “/”, “*”, “-“ and “+” keys all slightly smaller and moved clockwise around the number pad to make room for an extra “=” key to the left of the “/”. Instead of a Num Lock key, the Apple keyboard provides a Clear key, and above the number pad there are four additional function keys: F16 through to F19.
Key Size and Action
Given optimal caffeination and house-music selection, I can touch type real fast. For fast typing to be a happy activity, you need the keys to be wide enough that you can hit the right key, and the keypress action needs to be faultless. Hitting a sticking key when typing fast is like getting a stone jammed under the wheel of your skateboard when speeding downhill - painful.
I don’t have a Logitech or Microsoft keyboard to compare against, but the keys on my old keyboard were frustratingly undersized. The width of the top surface of the keys is only about 12 mm. The Apple keys are 15 mm square with a 4 mm gap between each key, so the total distance from the left edge of one key to the left edge of the next is about 19mm. My ThinkPad’s keyboard actually beats the Apple keyboard by 1 mm on key size and edge-to-edge difference. Keyboard comfort will no doubt differ from person to person, but I’ve personally been finding the key size to be very good, with mistypes rare.
I read that the keys on the new Apple keyboard are based on those from the MacBook. It rings true because the keypress action is basically the same as using a laptop keyboard, although much quieter than any laptop keyboard I’ve ever used. Given this type of construction, the keys have less distance to travel before they connect. Again it’s a personal thing, but if you find laptop keys comfortable, then you’ll like the Apple keyboard.
Mapping Keys for PC Compatibility
So the first thing you’ll want to do if you get an Apple keyboard for your PC is remap the Apple-style keys to PC-style functions. Windows supports remapping keys via entries in the system registry, and a very neat little tool by Randy called SharpKeys makes editing those mappings very easy.
SharpKeys is one of those friendly little apps that doesn’t require installation - just unzip and run. I love that. The main window of the SharpKeys interface lists out all the mappings you have, which is probably none at first.
To map a key, click the Add button to get the Add New Key Mapping window. Then find the key codes you want to map from and to in the two lists, or just use the Type Key function to type the keys you want to map. It can be handy to have a PC keyboard attached at the same time so you can use the Type Keys function to quickly select the target keys for your mappings.
Here’s a suggested basic key mapping:
- F13 -> Print Screen
- F14 -> Num Lock
- F15 -> SharpKeys didn’t seem to be able to map to the Pause key, which would be the PC equivalent for the key location, so instead I mapped my F5 key to the App: Calculator function.
- Fn -> This key doesn’t seem to send a message that can be picked up by SharpKeys, so at least for the moment I’ve left that as a dead key. The equivalent on the PC keyboard would be the Insert key.
- Clear (comes through as the Euro sign key) -> Num Lock
- Keypad “=” (comes through as Unknown 0x0059) -> “= +”
Also note that the eject key doesn’t appear to be mappable in SharpKeys.
This makes the Apple keyboard behave like a PC keyboard with two exceptions:
- No Insert Key
- No Pause / Break Key
Then you have the extra four function keys above the number pad that you can map. I’ve mapped mine to multimedia functions, so I can drive WinAmp from my keyboard.
Performance
As a General Keyboard
I have to say that the new Apple keyboard is very nice for general writing tasks, especially if like me you work on a laptop keyboard a lot and are comfortable with that style of keypress action. They key size and layout is good and results in few mistypes, even for someone with fairly large hands like me.
As a Coding Keyboard
For writing code, as for writing anything else, this is a very comfortable keyboard. It would be nice if the function keys were grouped into fours, especially when using IDE’s that map a lot of common functions to the F keys.
Also as I use the vim text editor for writing most of my code, I hit the Esc key probably about 10 or so times per minute. The reduced vertical size of that strip of keys means I tend to overshoot the Esc key sometimes, but that is probably something that I’ll get used to.
As a Gaming Keyboard
Well, if you tend to pound the keyboard enthusiastically when you game, the Apple keyboard may not be the right one for you. It seems robust enough, but I’m pretty sure it couldn’t take the same kind of punishment as an old-skool board. However if you’re fan of mapping the number pad to game functions, you might find the extra “=” key, plus the four extra function keys handy.
The first thing I did with my Apple keyboard of course was to take it for a spin in Half-Life 2. I found that the extra function keys wouldn’t map in HL2, but by using SharpKeys to map F16 through F19 to Q through R, I was then able to map those four keys in HL2.
Summary
Depending on exactly what you use your PC for, the Apple keyboard may well be worth a look if you’re in the market for a new PC.
To sum up the key differences, after remapping keys with SharpKeys:
- You lose the Insert key and the Pause / Break key
- The Eject key can’t be mapped to anything
- You get an extra “= +” key on the number pad
- You get an extra four function keys across the top of the number pad which you can map to anything you like, including multimedia functions or gaming controls