I picked up a Synology NAS a couple of days ago and one of the first things I wanted to do was enable SSH access in order to be able to give my agentless backup system Replikant the ability to back from the NAS.
SSH is supported and documented but I found the docs a bit jumbled so here’s the complete process that worked for me:
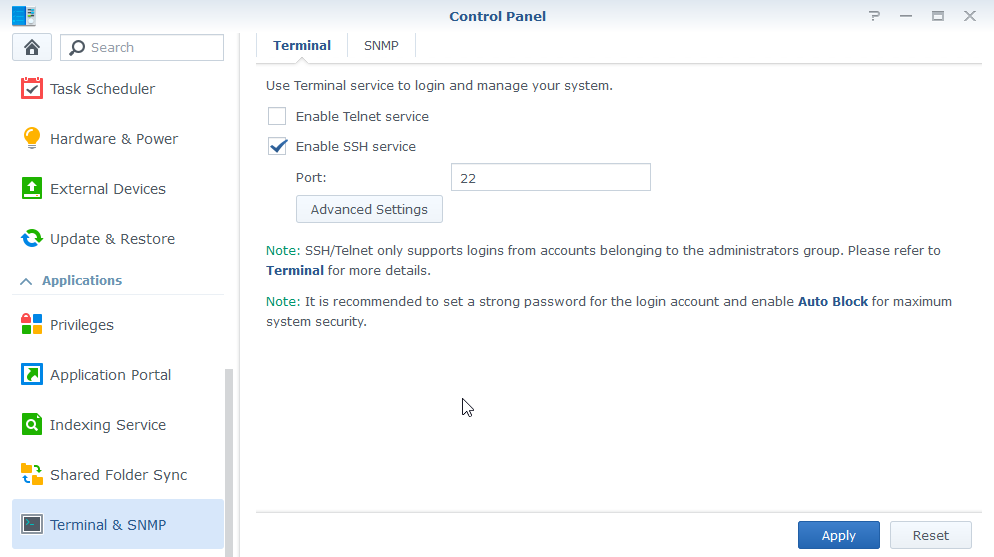
Enable SSH
- Login to DSM
- Open the Control Panel
- Locate the Terminal nav item and enable SSH if it is not already:
Create User
- Select User from the Control Panel nav
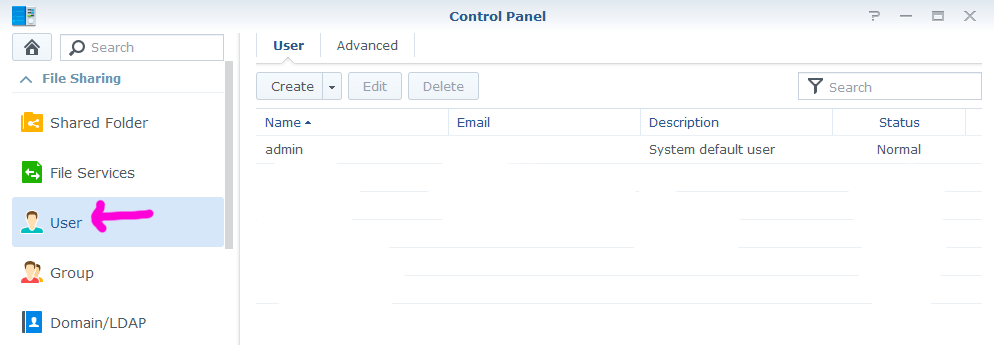
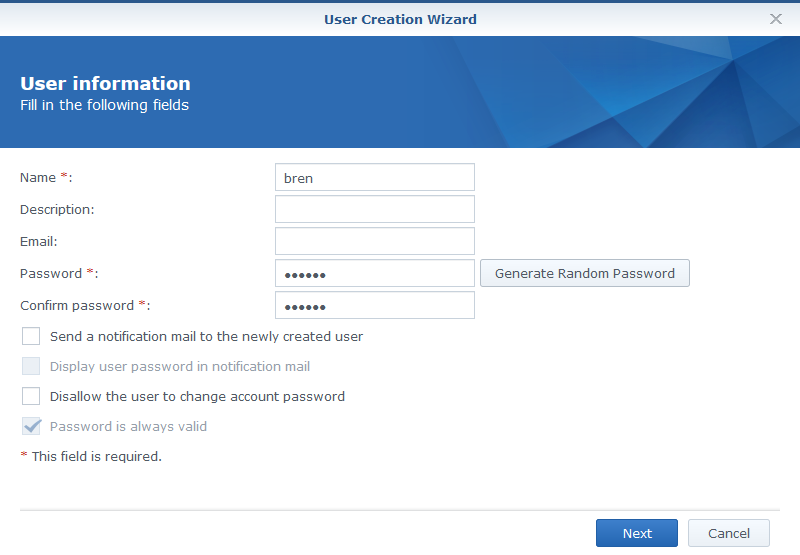
- Click Create and define the new user
- At the group selection page ensure the user is in the Administrators group - this is required in order to be able to use SSH. Even through the user must be in admins you can still limit the volumes they have access to.
Bring or Generate Key Pair
- On your client machine locate your key pair or generate a new one. To generate a keypair on Windows grab PuTTYgen. For Linux run:
ssh-keygen -t rsa -b 2048
- If you’re using PuTTY on Windows, in a few moments you can just copy the contents of the public key and paste it into authorized_keys (see below) but if you’re using Linux as your client you’ll need to SCP the public key to your NAS - do that now, something like:
scp ~/.ssh/id_rsa.pub myuser@nas:/var/services/homes/myuser
Register Public Key as Authorized
- Now use your SSH client (e.g. PuTTY on Windows or ssh command-line on Linux) to open a session to your NAS using your new user’s credentials
- Create the .ssh directory:
mkdir .ssh
- If you’re using PuTTY on Windows you can now edit the new authorized_keys file in vim and paste the contents of your public key through the PuTTY window:
vi ~/.ssh/authorized_keys
- If you’re using Linux as your client you can just rename the uploaded public key to be authorized_keys:
mv ~/id_rsa.pub ~/.ssh/authorized_keys
Fix Permissions on User Home Directory
OpenSSH is very strict about permissions - when authenticating it checks that the permissions around the user’s public key are set in such a way that the key could not have been tampered with by another user. This means:
- The directory
~/.sshshould have mode 0x700 - rwx for user only - The file ``/.ssh/authorized_keys` file should have mode 0x600 - rw for user only
- The user’s home directory should have mode 0x700 - rwx for user only
So the final step is to set the mode on the home directory correctly
chmod 700 ~
chmod 700 ~/.ssh
chmod 600 ~/.ssh/authorized_keys
Now you will be able to login using the private key as the credential.
Note that we have not disabled password authentication (which is the best practice). So we have the convenience of keypair auth but not the security - as far as I currently know disabling password auth is not supported.