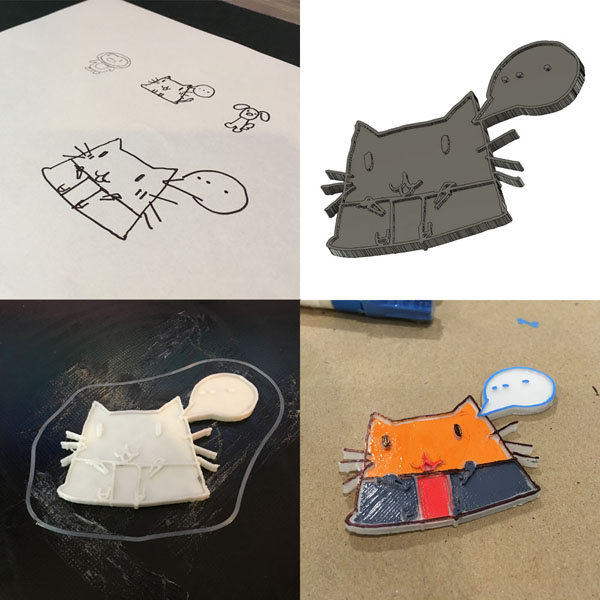
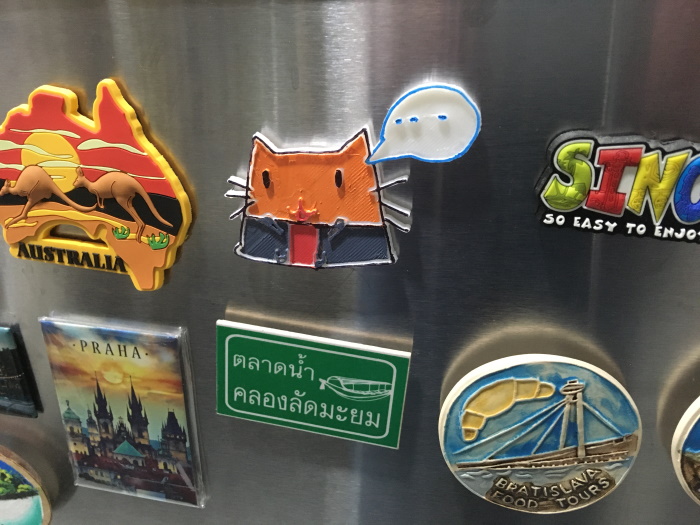
Our niece Nong Peak stayed over this weekend and this morning we made a cute cat fridge magnet which turned out pretty nicely:
Here’s how we did it:
Sketch
Peak initially decided the design would be a penguin however after trying a few she decided on a cat design which I asked her to redraw at a large size to make it easier to scan in:

Import
This project gave me a chance to learn how to create a 3D shape from a 2D paper sketch. The method I used was:
- Scan the image with a flatbed scanner
- Load the scan into Gimp, clean it up a bit using the paint brush tool to smooth out edges and fill in gaps
- Use the fuzzy select tool to select the outline
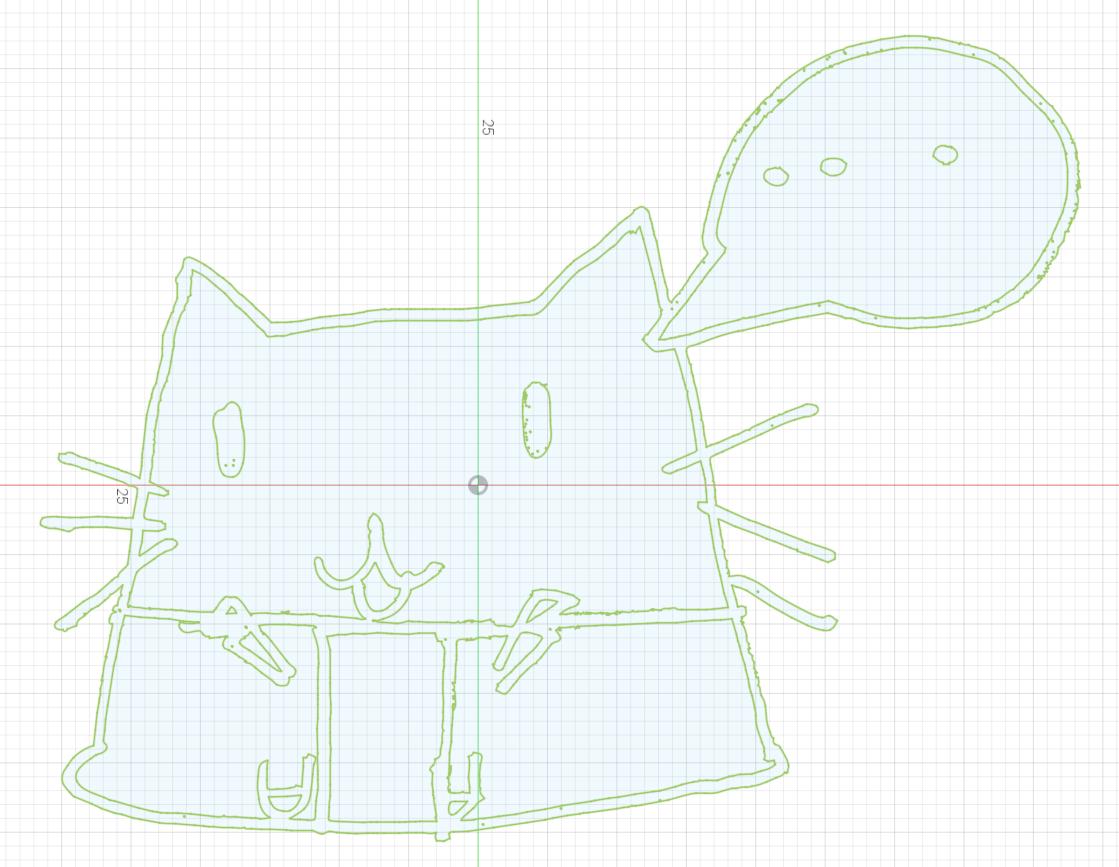
- Use the Select / To Path option to convert the selection into a vector path
- Export the path to SVG
- Create a new sketch in Fusion360 and use Insert SVG to load the path from the SVG
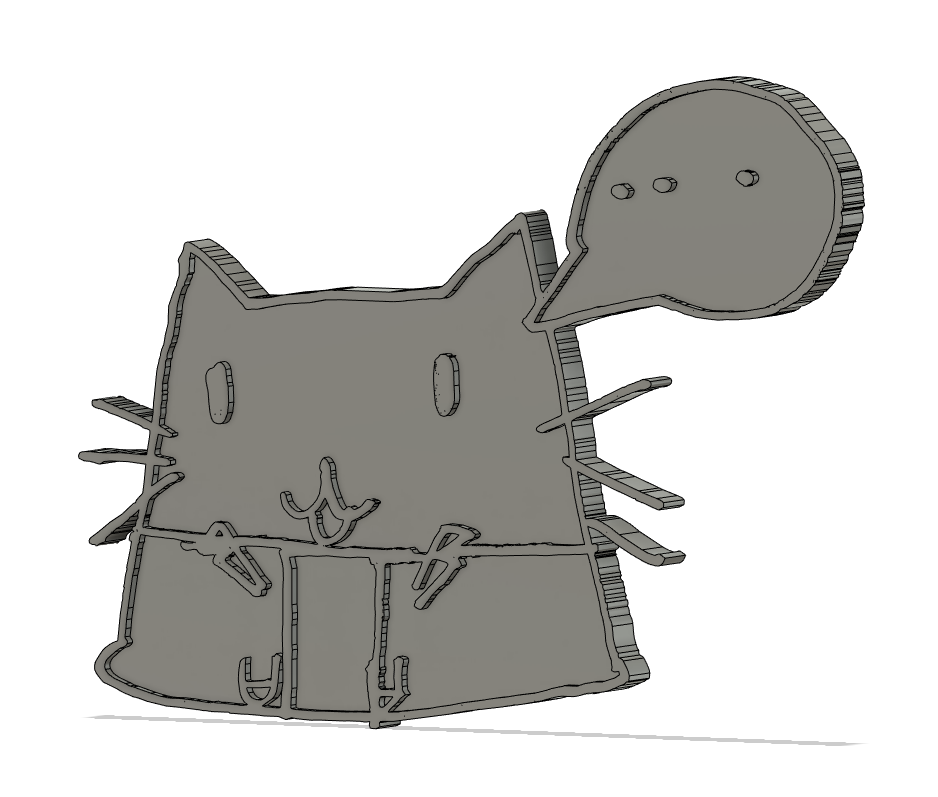
Extrude
As you can see above paths were created on both sides of the black sketched lines. For the extrusion I first selected all regions for the shape and extruded to 3mm. I then selected only the regions that were originally the black lines and extruded to 4mm. The result was a solid body with a raised profile where the black lines had appeared in the original sketch:
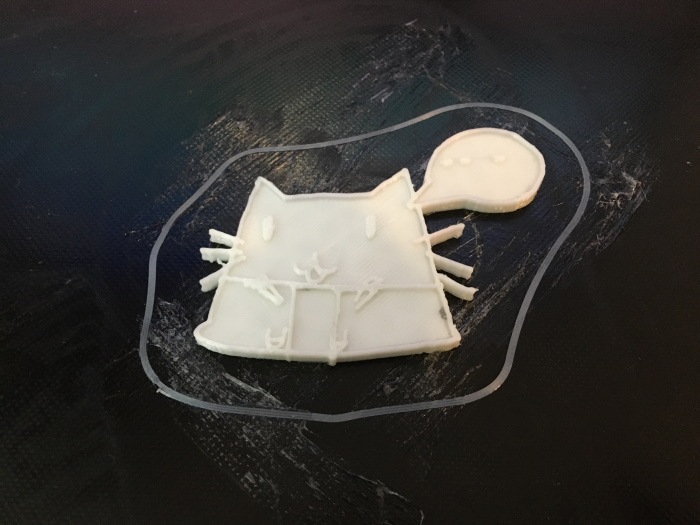
Finally we printed the 3D shape - the great thing about this project is that being only a few layers high and being fairly small overall, the print was just under an hour. It came out quite cleanly:
Finish
In one of his videos Devin used paint pens to add color to a print. I thought this would be great for this project so I picked up a set from B2S yesterday:
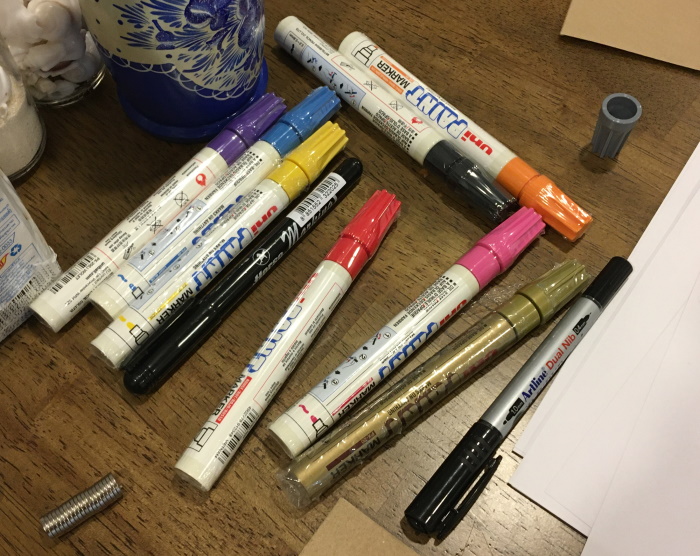
Peak made her color choices and painted the detail onto the print and finally I superglued a small 10mm x 2mm neodymium magnet onto the back. We tested it on the fridge and it works!
Future Process Improvements
There are two things I’d do differently for a project like this.
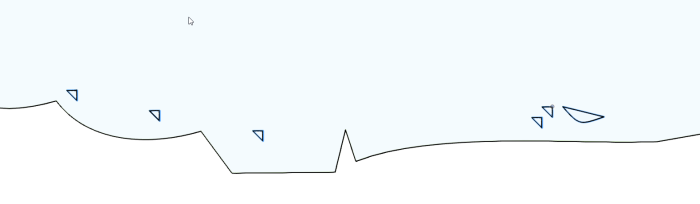
First: on this project I really rushed the import and extrusion part because I was competing with Fortnite for attention span, but next time around I’d spend some time cleaning up the path generated in Gimp by Selection To Path. It can create a lot of points - this shape had 923 points - many of which are unnecessary. More critically you can get small void triangles inside the shape where the fuzzy select excluded pixels that were outside it’s threshold - this should also be cleaned up before saving to SVG to avoid mesh problems later in Fusion360 - here’s an example of some junk triangles that have ended up in the SVG:
Second: the nib of the paint pens are quite thick and don’t get into the corners of the relief profile in the print. Other than that they work really well so next time I’d either get a fine paint brush and try to load it with paint from the pen to push into those corners, or otherwise consider just using tinned model paint and brushing it in.
Fun project!